In this family-friendly art project, you’ll make a colorful and festive mosaic pumpkin. Kids will love painting, cutting paper and gluing everything together to make a fun jack-o-lantern, just in time for Halloween!
Materials
-A few pieces of heavy white paper or cardstock
-2 brushes: one for each color
-Watercolors
-A piece of heavy black paper or cardstock
-1 white crayon
-Scissors
-Glue
Step 1: Painting
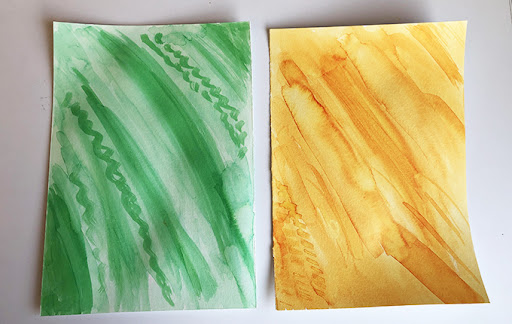
a. Take a piece of white paper and a white crayon. Draw a design on the white paper such as a spider web or some squiggles.
b. Using watercolors, paint the paper orange adjusting the amount of paint and water used to create different hues. Repeat this with green and let dry.
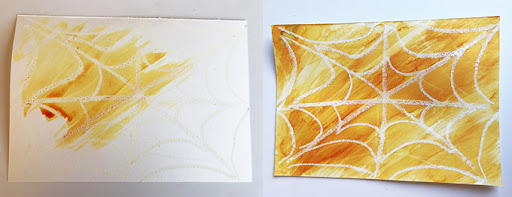
c. Your painting doesn’t have to be precise. You can create different textures and patterns as the paint dries. Experiment and have fun. These will be used to create the mosaic “tiles” for your pumpkin.
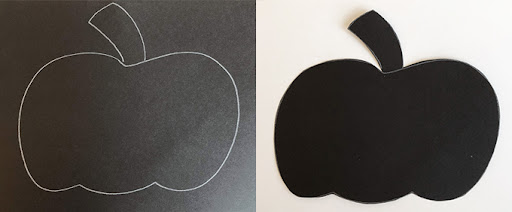
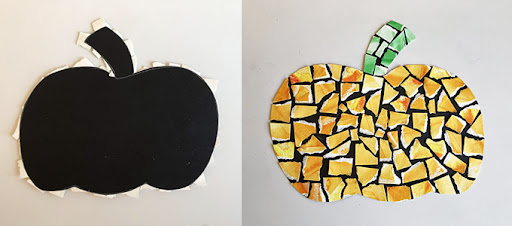
Step 2: Pumpkin Silhouette
a. Using a piece of black paper, draw your pumpkin shape using a white crayon. Then cut it out, saving the scraps to use later.
Step 3: Creating the Mosaic
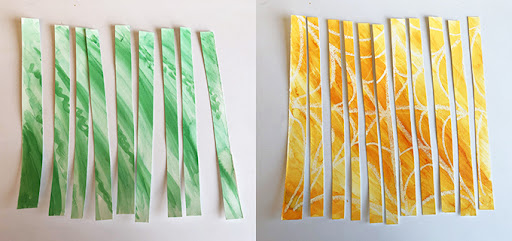
a. Take the painted papers and cut them into strips.
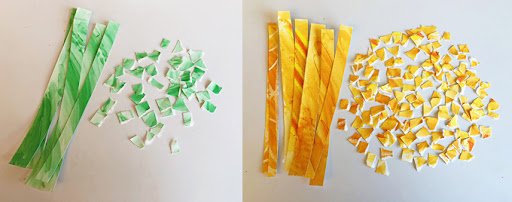
b. Tear each strip of paper into shapes, triangles work nicely. Don’t make them too small.
c. Using glue, start adhering your pieces onto your black pumpkin silhouette working from the center outward. Let the pieces hang over the edge as you will trim them afterward. Leave some space between the pieces to create contrast. Cover the whole shape including the stem. Let the glue dry.
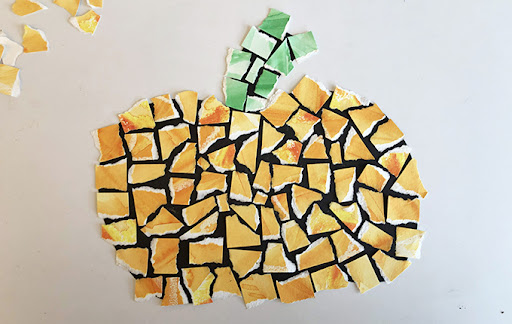
d. Flip the pumpkin over and trim the excess paper.
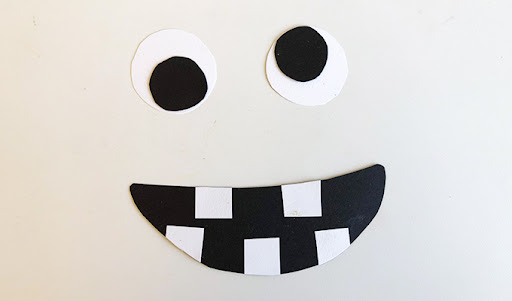
e. Make eyes and a mouth using the scrap paper you saved. Glue them on your pumpkin and you’re done!
Project inspired by Gail Bartel (theartistwoman.org)
Created by Andrea Minobe